
ScreenConnect Remote Support
Overview
ConnectWise ScreenConnect is a remote support and access tool that allows technicians to connect to your computer to assist you with connecting to or utilizing our services.
Personal Computer Repair
McLennan Community College Help Desk only able to assist with issues connecting to or utilizing our services. We are unable to provide support for the device itself, such as with hardware or operating system issues. You can find more information and support options at Personal Computer Repair.
Getting Started
Sessions are initiated solely by a MCC technical support representative and are not active at all times.
Connect to a Session – Windows
- Go to: ScreenConnect.
- Enter the code provided by the MCC technician and then click the blue arrow.
- Open/run/install the ScreenConnect.Client.exe file that downloads.
Connect to a Session – MacOS
- Go to: ScreenConnect.
- Enter the code provided by the MCC technician and then click the blue arrow.
- On the 'Join Session' screen click Download App or Launch App.
a. 'Download App' if you do not already have it installed.
b. 'Launch App' if you already have the app installed from a previous session. - If the site asks you to allow downloads on "mccsupport.screenconnect.com" click 'Allow'
- Once the download completes, open the ScreenConnect Client file.
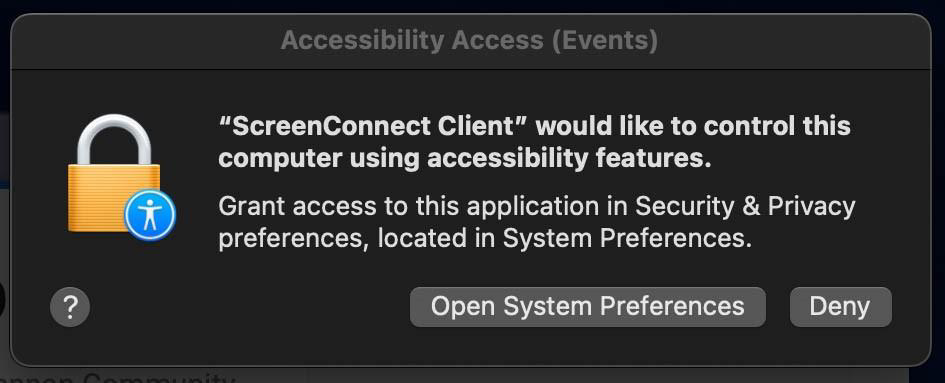
- Enable both Accessibility AND Screen Recording access to enable screen sharing.
- If after opening the file you receive a prompt to 'Open System Preferences', you will need to follow the steps
below before your screen will be visible. Note: These images may differ from your MacOS version.- Click 'Open System Preferences' OR click the Apple icon at the top left and select 'System Preferences…' > 'Security & Privacy'.

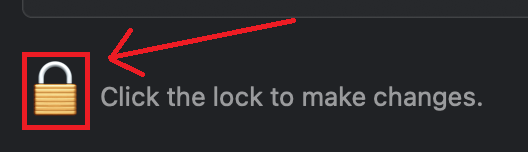
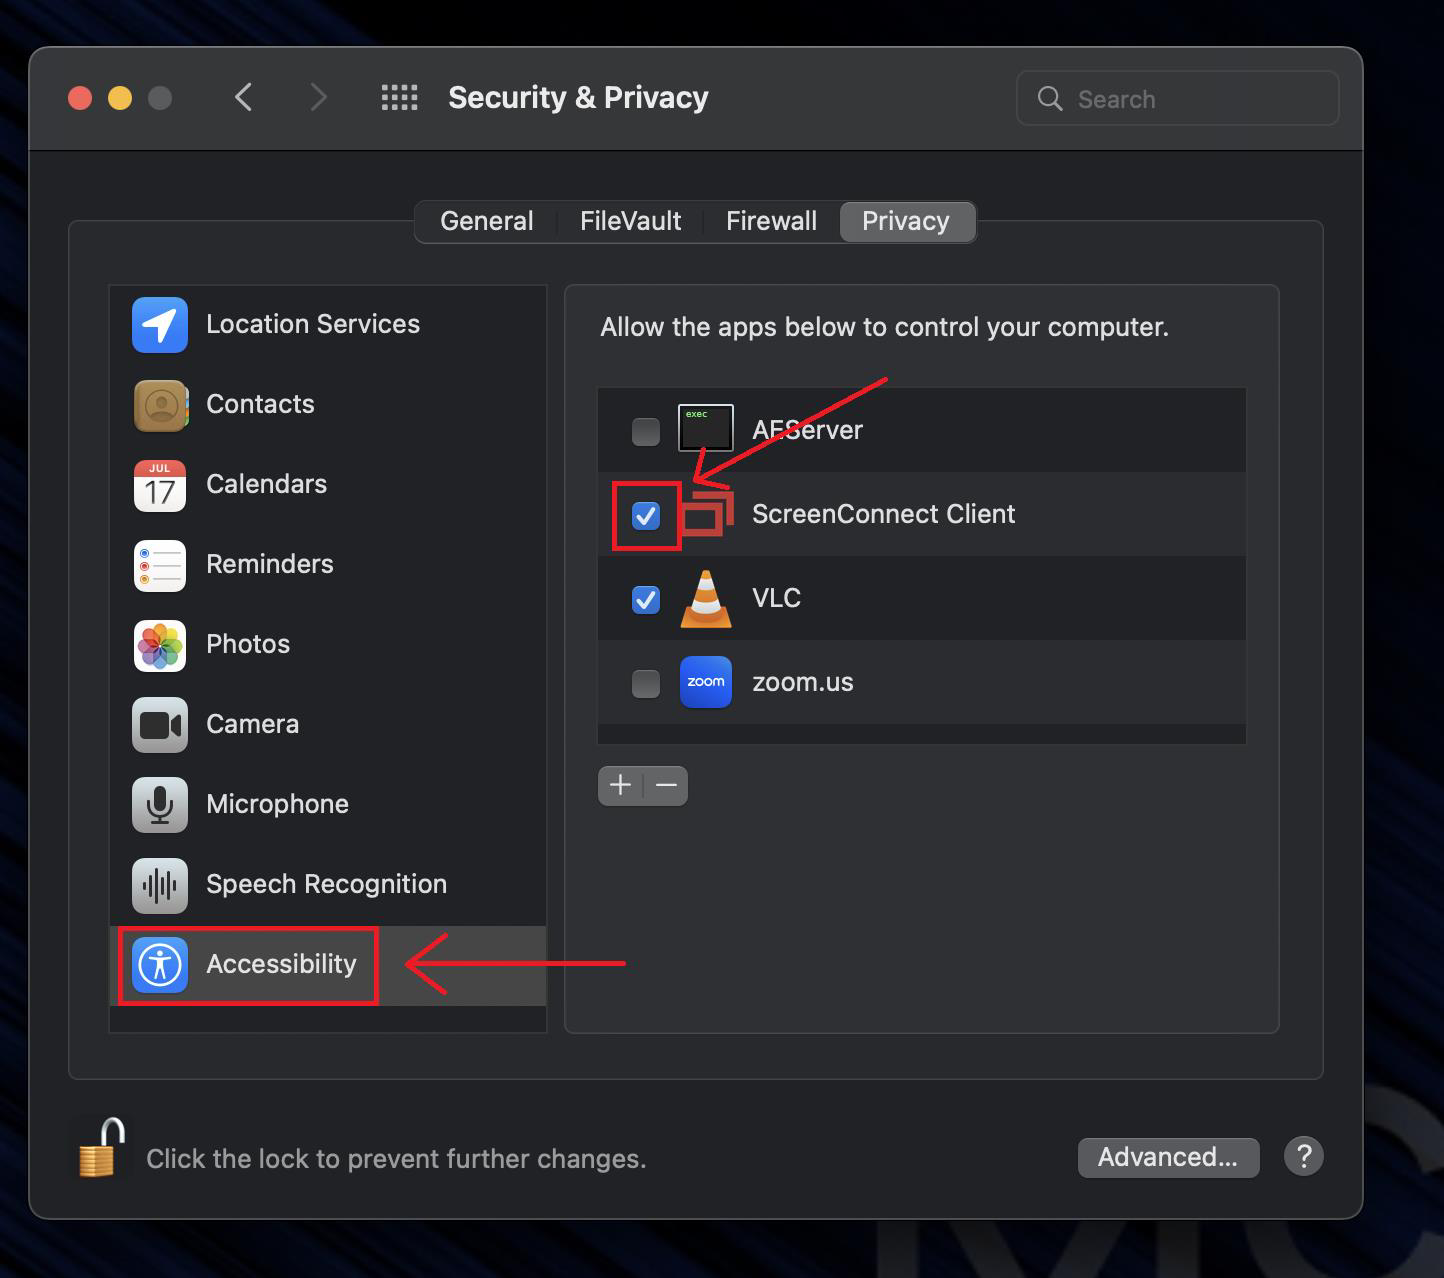
- Select the Privacy tab at the top and then the Accessibility on the left-hand menu. Click the lock icon to make changes and when prompted, enter the credentials used to sign onto the Mac.
- Check the box next to ScreenConnect Client. If prompted to 'Quit & Reopen' ScreenConnect Client to apply the changes go ahead and do so.

- Select Screen Recording on the left-hand menu and repeat the process to grant permission to ScreenConnect.
- Once both settings have been applied, click the lock icon to return it to the locked position.
- Click 'Open System Preferences' OR click the Apple icon at the top left and select 'System Preferences…' > 'Security & Privacy'.

Start a ScreenConnect Session – Android/ChromeOS/iOS
Note: Other than on Samsung smartphones, devices will be in View Only mode.
- Go to your device's app store and install: ConnectWise Control by ConnectWise
Note: After installation, the app shortcut may be named: ScreenConnect
Note: ChromeOS – App is only available in the Google Play Store. It is not available in the Chrome Web Store. For a device managed by your school/organization, ask your Google administrator to allow the Play Store on your device or sign in with your personal Gmail account. - Once installed, open the app.
a. For Chromebooks, click the device type option at the top and select 'Tablet' - If it asks for the 'ScreenConnect URL', enter mccsupport.screenconnect.com and click 'GO' (on subsequent uses it will skip this step and be on the code screen)
- On the 'Join with a code' screen, enter the 5-digit code from provided by the MCC technician and click the arrow to the right to join the session
- a. Android/iOS: Accept any app/permission requests
b. On ChromeOS: Select the screen thumbnail and then click 'Share' to share your device's screen
Note: It may take up to a couple of minutes for the initial screen display on ChromeOS. If it does not display for the technician, exit the app and retry.